Best 3D Printers for Teens — Zero Setup, Real Results (2026)
Updated October 2026. The rule for every printer on this list: teen opens the box on Christmas morning, no parent required, first successful print on the build plate within one hour. That’s it. If a printer couldn’t clear that bar, it didn’t make the cut — no matter how good it is for experienced users.
Jump to: Why 3D printing matters · Our criteria · Top 4 picks · ESP32 combo projects · Comparison table · Filament guide
Why a 3D Printer Changes Everything for a Teen Maker
There’s a moment that happens to every maker: you’ve written the code, wired the circuit, and the sensor reads perfectly — and then you realize the whole thing is just sitting loose on a table, held together by tape and stubbornness.
A 3D printer fixes that permanently.
With a printer, the gap between “project on a breadboard” and “thing that looks and works like a real product” shrinks from impossible to an afternoon. Custom enclosures for an ESP32. Robot chassis sized exactly to fit your motors. A wall-mounted holder for a sensor dashboard. A case that makes a Waveshare display look like a commercial device instead of a homework assignment.
For teens who are already coding and building with microcontrollers, a 3D printer is the bridge between the digital world and the physical one. It’s the difference between making a gadget and making a product. Projects become things you can hand to someone, mount on a wall, or enter into a competition. The confidence jump is enormous.
It’s also the gateway to engineering thinking: design a part, print it, test it, redesign. That iteration loop — the same loop that professional engineers and product designers use — is now accessible in a bedroom.
Our Criteria: What “Zero Setup” Actually Means
Most 3D printer “beginner” guides list printers that are technically accessible to beginners — meaning, with several hours of watching YouTube tutorials, reading forums, and failed prints, a patient adult can get them working. That’s not what we’re recommending here.
For a gift printer, zero setup means:
- No manual bed leveling. Automatic bed leveling (ABL) with mesh compensation, not a paper-test-and-hope approach.
- First print succeeds. The included test file or auto-start sequence should produce a usable print on the first attempt, not the third.
- Assembly under 15 minutes, or fully pre-assembled. Complex builds require mechanical confidence most teens don’t have yet.
- Enclosed or genuinely safe. Open-frame printers expose moving parts and hot ends at 200°C+. For bedroom use, enclosures or robust safety design matter.
- Under $400. Above this threshold, you’re buying a prosumer tool, not a beginner gift.
- Decent print quality. Sub-0.2mm layer height capability and minimal stringing on standard PLA.
Every pick below clears all six bars.
Top 4 Picks
1. Bambu Lab A1 Mini — ~$219 (Solo) / ~$329 (with AMS Lite)
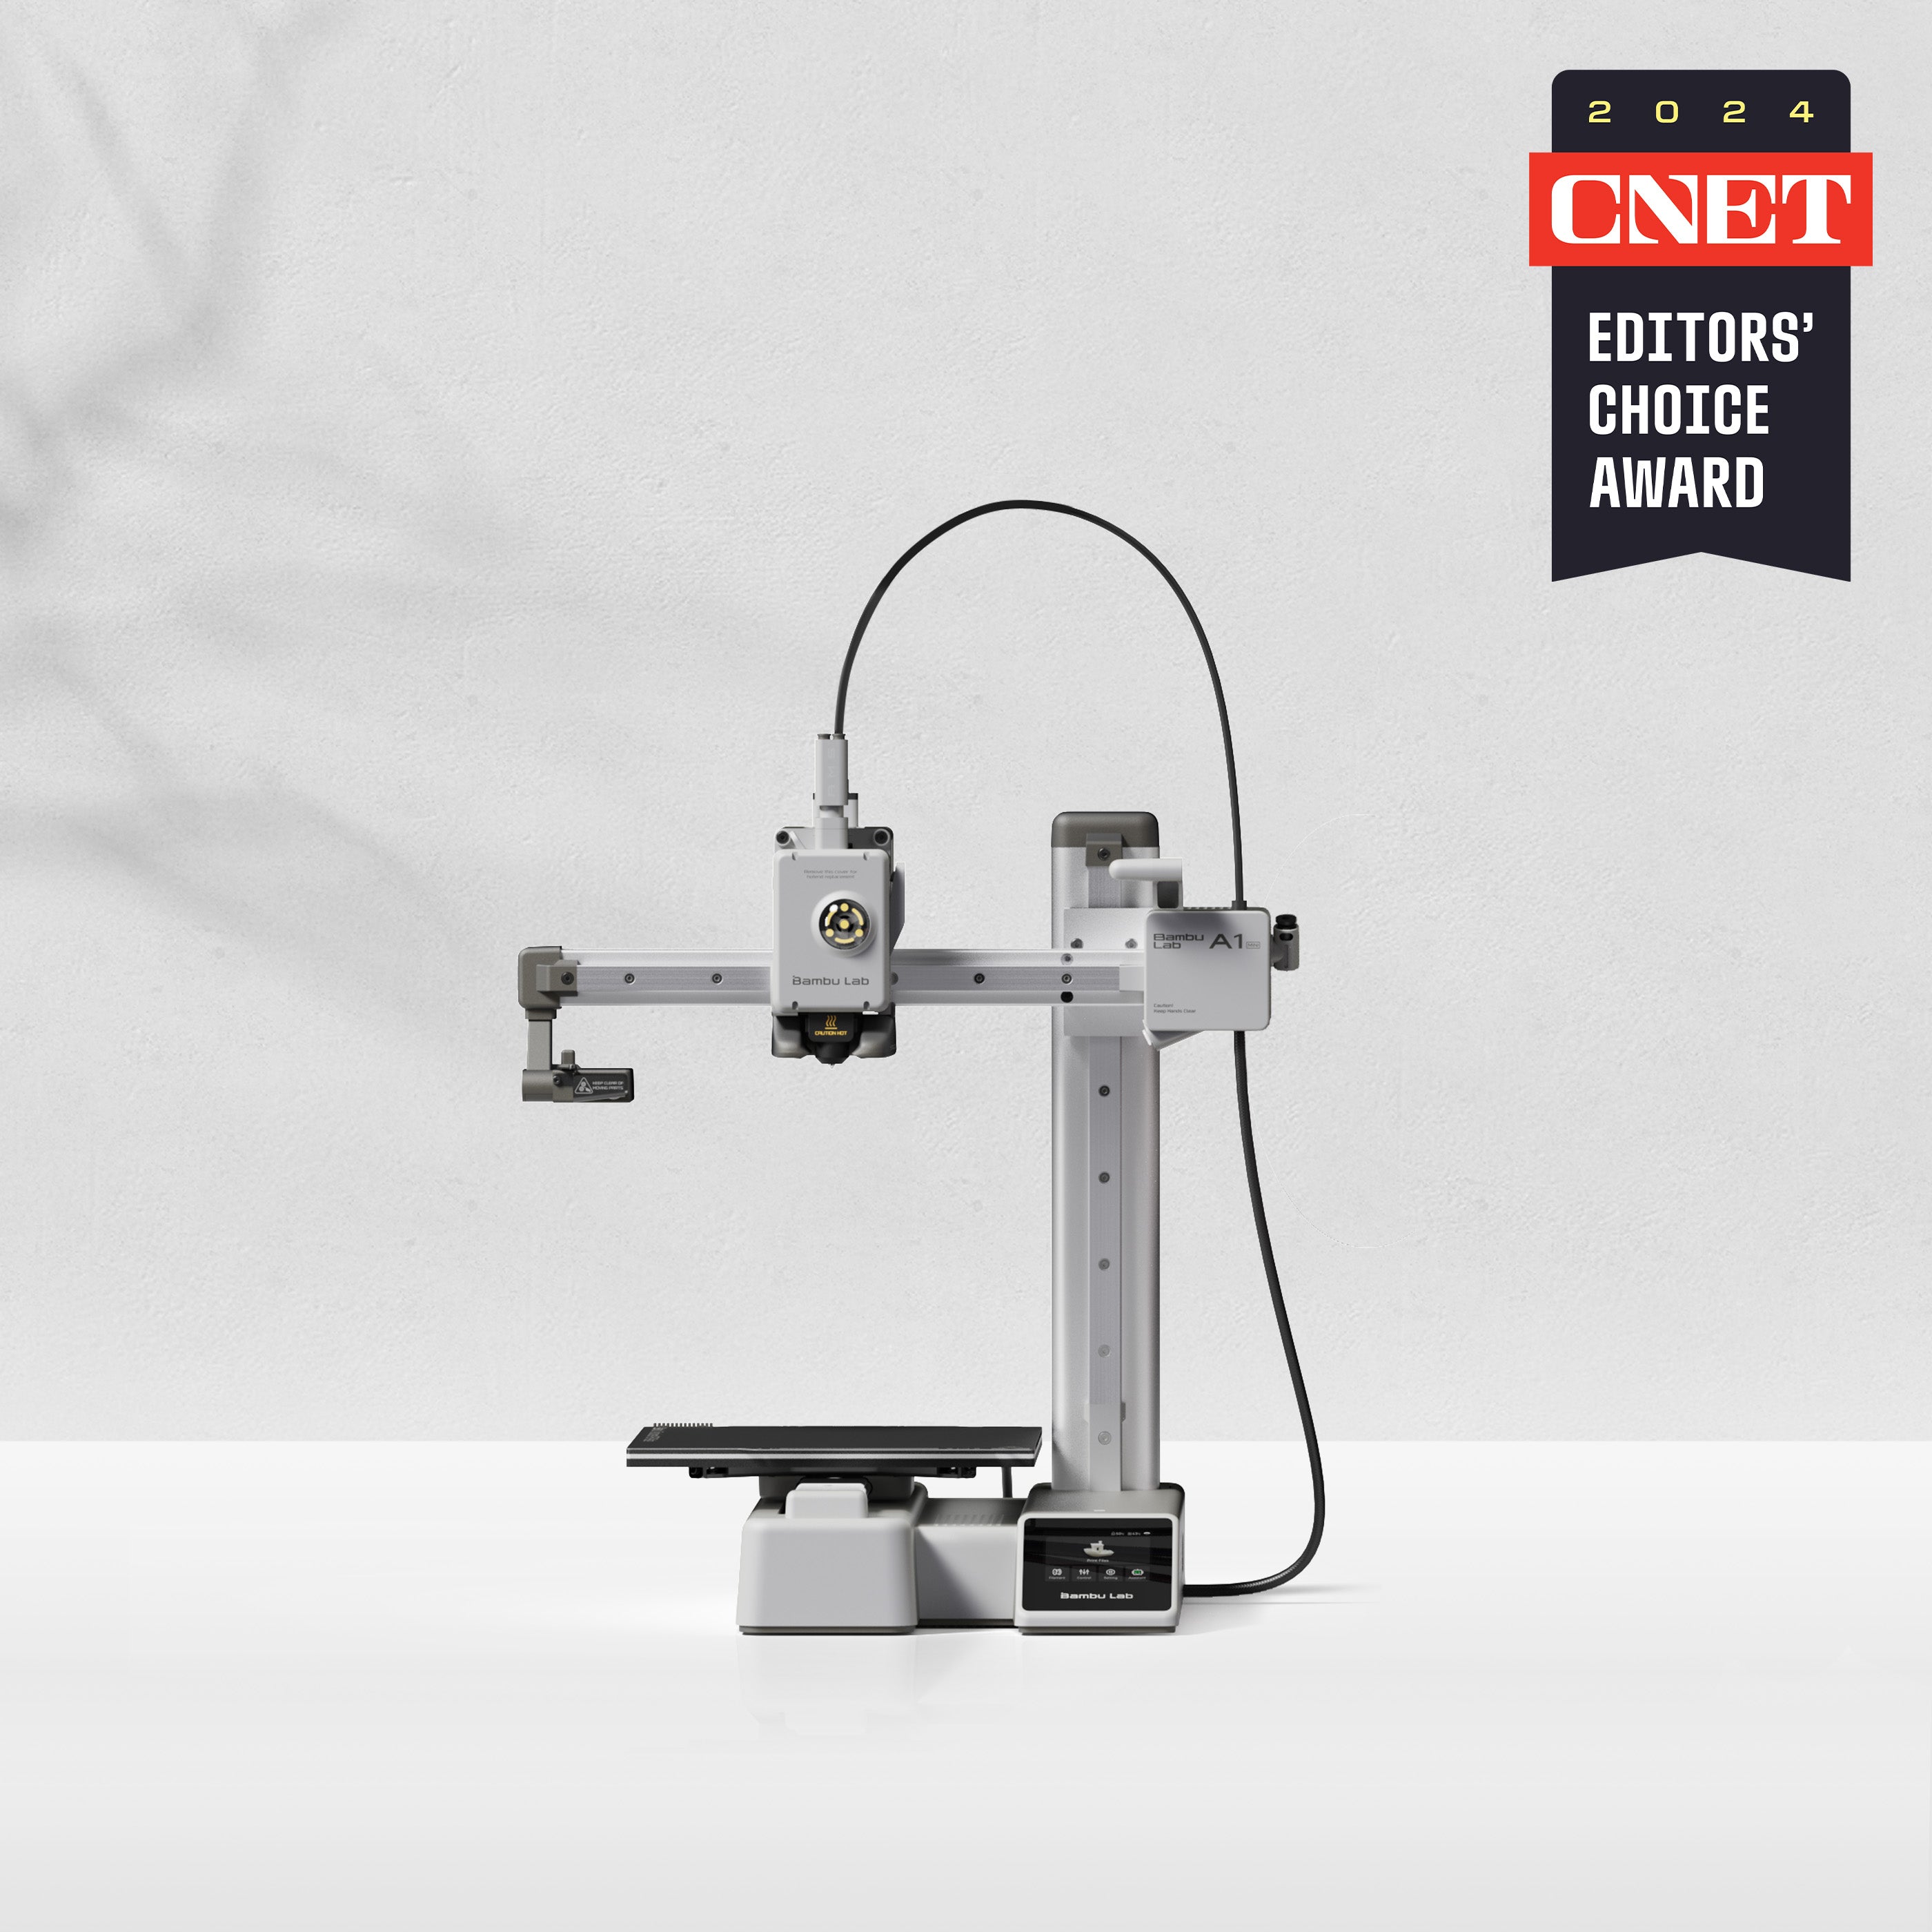
The gold standard for zero-setup printing. Closest thing to a plug-and-play 3D printer under $300.
The Bambu Lab A1 Mini is what happened when a company staffed by ex-DJI engineers decided that 3D printing’s biggest problem wasn’t speed or quality — it was the fact that most people gave up before their first successful print. They solved it completely.
What it is: A compact CoreXY 3D printer with a 180 × 180 × 180 mm build volume, running Bambu’s own firmware on a locked-but-capable platform. It ships mostly assembled, with everything configured at the factory. Unbox it, connect power and the app, hit print on the included test file, and watch it go. Most people report first print in 20 minutes from opening the box.
Why it’s perfect for teens: The auto-calibration sequence runs every single time it starts — bed leveling, vibration compensation, first-layer calibration. It doesn’t ask the user to make decisions. The Bambu Handy app works on iOS and Android and walks through setup with visual prompts. There’s nothing to tune, nothing to research, nothing to fail on.
Zero-setup features:
- Automatic bed leveling with multi-point mesh compensation
- Automatic first-layer calibration (no paper tests)
- Vibration and flow-rate auto-compensation
- Ships pre-assembled — no screwdriver required for basic setup
- One-tap print from the app or touchscreen
Print quality: For PLA and PETG, excellent. Wall lines are clean, overhangs are handled well up to 45°, and the default profiles in Bambu Studio (the slicer) are tuned for the machine. First prints consistently look good.
Speed: Up to 500mm/s maximum, 250mm/s practical for quality prints. Noticeably faster than older machines.
What teens can print: Microcontroller enclosures, robot parts, keychains, miniatures, functional clips and brackets, replacement parts for other gear, phone stands, cable organizers — anything in PLA or PETG.
The AMS Lite option: For $110 more, the combo version adds Bambu’s AMS Lite multi-color system, letting you print in up to 4 colors automatically. For creative teens, this is a significant upgrade. For practical makers, the solo version is all they need.
Noise level: ~48 dB in standard mode. Quiet enough for a bedroom without being inaudible.
Filament compatibility: PLA, PETG, TPU. Not ABS/ASA (open frame, 80°C max bed). For most teen projects, this covers everything needed.
Price: $219 standalone, $329 with AMS Lite multi-color at Bambu Lab official store.
2. Creality Ender 3 V3 KE — ~$260–$299
Best open-source option. Klipper firmware, massive community, and real auto leveling.
Creality is the most successful 3D printer brand in history, and the Ender 3 V3 KE is the version of that printer that finally makes sense as a beginner machine. Every previous Ender 3 required manual bed leveling, fiddling, and patience. The V3 KE doesn’t.
What it is: An open-frame CoreXZ printer running Klipper firmware — the same professional-grade firmware that enthusiasts spend hours configuring manually, here pre-configured by Creality out of the box. Build volume is 220 × 220 × 240 mm, with a direct drive extruder and a full-color touchscreen interface.
Why it’s great for teens: The Klipper firmware includes auto bed leveling with a CRTouch probe and automatic Z-height calibration. The setup experience is significantly better than older Creality machines — it still requires assembling a few parts (mounting the gantry, connecting cables), but the process takes about 15–20 minutes and the instructions are clear. The print quality at this price is hard to match.
Zero-setup features:
- CRTouch auto bed leveling with mesh compensation
- Automatic Z offset calibration
- Klipper firmware with pre-tuned profiles
- Wi-Fi connectivity for remote monitoring
- Direct drive extruder for flexible filaments
Print quality: Very good for the price. Klipper’s input shaping reduces ringing artifacts that plague older printers, and the direct drive extruder handles PLA, PETG, and TPU reliably.
Speed: Up to 500mm/s max, 300mm/s practical. Genuinely fast for the price bracket.
The open-source advantage: Because it runs Klipper with an open architecture, there are thousands of community mods, macros, and upgrade paths available. A teen who grows into the hobby will never outgrow this machine’s potential.
Trade-off: The open frame means no enclosure. ABS/ASA printing is unreliable. The assembly (15–20 min) is a small hurdle vs. the Bambu, but well within reach of a confident teenager.
Price: ~$260–$299 at Creality official store and Amazon.
3. AnkerMake M5C — ~$239–$299
Best app experience. If the teen already has Anker gear, this integrates seamlessly.
AnkerMake is what happens when Anker — the company behind ubiquitous chargers, cables, and earbuds — decides to make a 3D printer. The M5C is their answer to the Bambu A1 Mini: a fast, beginner-friendly machine that leans heavily on an app-first experience.
What it is: A CoreXY open-frame printer with a 220 × 220 × 250 mm build volume, built-in AI camera for print failure detection, and tight integration with the AnkerMake app. It ships mostly assembled. Setup takes about 15 minutes. The AI camera actively monitors prints and can pause automatically if it detects a failure.
Why it’s great for teens: The app is genuinely excellent — clean interface, easy profile selection, and the failure-detection camera is a real confidence builder for new users (failed prints are frustrating; knowing the machine caught it while you were asleep is reassuring). Auto bed leveling is reliable, and the default PLA profiles produce good results immediately.
Zero-setup features:
- Automatic bed leveling
- AI camera with failure detection
- App-guided setup with step-by-step instructions
- Pre-sliced test print ready to go
- Remote monitoring from phone
Print quality: Good to very good on PLA and PETG. Not quite at Bambu’s level, but competitive for the price.
Speed: 500mm/s maximum, 250mm/s practical. Comparable to Bambu in real-world use.
Trade-off: No screen on the printer itself — all control is through the app. This is elegant once you’re used to it, but slightly counterintuitive at first. The AnkerMake slicer is functional but lags behind Bambu Studio in features and community profiles.
Best for: Teens who are already in the Anker ecosystem (power banks, charging stations, soundcore headphones), or families who want app-based monitoring of the printer without separate accounts.
Price: ~$239–$299 at AnkerMake official store and Best Buy.
4. Bambu Lab P1S — ~$399
The “if budget allows” pick. Enclosed, fast, multi-material capable, and genuinely future-proof.
The P1S is what serious makers wish they’d started with. It’s the fully enclosed version of Bambu’s mid-range lineup — sealed chamber, activated carbon filtration, 100°C bed temperature, and support for engineering filaments like ABS, ASA, and PA-GF. For a teen who’s going to grow into this machine, it’s the last printer they’ll need for years.
What it is: A CoreXY enclosed printer with a 256 × 256 × 256 mm build volume, all-metal hotend capable of 300°C, automatic bed leveling, vibration compensation, and a built-in 720p camera. Like the A1 Mini, it ships ready to print — unbox, connect power and app, print. Setup takes under 10 minutes.
Why it’s the upgrade pick: The enclosure does two important things: it makes ABS/ASA printing reliable (important for parts that need heat resistance, like under a car dashboard or in outdoor electronics projects), and it contains fumes from engineering filaments. For bedroom use, a sealed printer with filtration is genuinely better for air quality than an open-frame machine.
Zero-setup features:
- All Bambu automatic calibration systems (same as A1 Mini)
- Fully enclosed with passive heating chamber
- Activated carbon + HEPA filtration
- Compatible with AMS multi-color system (sold separately)
- Same Bambu Studio slicer as A1 Mini — unified learning curve
Print quality: Excellent. The P1S consistently produces professional-quality prints. Layer lines are clean, bridging is solid, and the enclosed environment eliminates the warping and delamination issues that plague open-frame printers on ABS.
The multi-color path: The P1S works with Bambu’s AMS (Automatic Material System) for up to 4-color printing, with upgrade paths to the AMS 2 Pro for even more capability. For creative makers who want to print functional art, this is compelling.
Noise: Slightly louder than the A1 Mini due to enclosed fan systems, but still reasonable for bedroom use.
Price: $399 standalone at Bambu Lab official store. The P1S AMS Combo is $499. Regularly hits $399 on sale — was recently marked down from its $699 launch price.
ESP32 + 3D Printer Combo Projects
The real magic happens when you combine a microcontroller with a 3D printer. Here are five project ideas that use both — perfect for teens who already have an ESP32 or M5Stack board:
1. Custom Case for the M5Stack Cardputer
The M5Stack Cardputer is already one of our favorite hacker gadgets, but it ships in a bare plastic shell. Print a custom enclosure that adds a tilt stand, a wrist strap anchor, or a mounting bracket for attaching to a wall or tripod. The Cardputer’s dimensions are publicly documented, so designing a case in Tinkercad or Fusion 360 is a solid first CAD project. The result: a device that looks designed, not assembled.
Skills: Basic CAD in Tinkercad, measuring with calipers, designing for functional fit.
2. Smartwatch Enclosure for a Waveshare Round Display
Pair a Waveshare 1.28-inch round touch display with an ESP32-C3, write a watch face in Arduino, and print a custom wristwatch enclosure sized around your parts. This is the project that teaches tolerances — the difference between a part that fits and one that doesn’t is 0.2mm. You’ll print it three times before it’s right, and each iteration teaches more than a tutorial.
Skills: Tolerance fitting, designing around PCB dimensions, wristband integration.
3. Robot Chassis for a Line-Following Robot
Most beginner robot kits use flimsy acrylic chassis that vibrate apart under motor torque. Design and print your own: a solid chassis with exact motor mount dimensions, proper wheel wells, and a sensor bracket positioned for clean ground clearance. Add an ESP32 for wireless control and Wi-Fi logging. This project teaches mechanical design, not just electronics.
Skills: Designing for mechanical loads, motor mount tolerances, sensor positioning.
4. Wall-Mounted Sensor Dashboard Holder
Print a clean wall-mount bracket for an ESP32 + e-ink display running a home sensor dashboard (temperature, humidity, CO2, whatever you’re monitoring). Add a cable management channel, a snap-fit back panel, and a VESA-compatible wall anchor. The result goes from “ESP32 taped to the wall with command strips” to “smart home panel that looks intentional.”
Skills: Wall-mount design, cable management, designing for screw inserts.
5. Custom Game Console Enclosure
Take an ESP32-S3, a small color LCD, a LiPo battery, and a set of tactile buttons, write a simple game in Arduino (Snake, Tetris, a basic platformer), and print a game console shell around it. This is a portfolio-level project. A working handheld game console that you built from scratch — enclosure, electronics, and code — is the kind of thing that gets noticed at college applications, maker fairs, and internship interviews.
Skills: Battery and PCB fitment, button travel tolerancing, ergonomic shaping.
Comparison Table
| Printer | Price | Setup Time | Enclosure | Build Volume | Best For |
|---|---|---|---|---|---|
| Bambu Lab A1 Mini | ~$219 | ~20 min | Open frame | 180×180×180mm | Easiest start, best beginner experience |
| Creality Ender 3 V3 KE | ~$260–$299 | ~20 min | Open frame | 220×220×240mm | Open-source, larger build volume |
| AnkerMake M5C | ~$239–$299 | ~15 min | Open frame | 220×220×250mm | App experience, failure detection |
| Bambu Lab P1S | ~$399 | ~10 min | Fully enclosed | 256×256×256mm | Serious makers, engineering filaments |
Our verdict: For most teens, the Bambu Lab A1 Mini is the right answer. It has the fastest path from box to first print, the most polished beginner experience, and a price that leaves budget for filament and projects. If budget extends to $399, the P1S is genuinely worth it for anyone who’ll grow into the hobby — the enclosure and engineering filament support create a much longer runway before outgrowing it.
The Ender 3 V3 KE is the best pick for a teen who’s already interested in the technical side of 3D printing — who wants to understand Klipper macros, build community mods, and tinker with firmware. The AnkerMake M5C is best if the teen is deeply in the Anker ecosystem or specifically wants the AI failure-detection camera.
What Filament to Buy
Every printer above ships with a small sample spool of PLA — typically 200–300g, enough for a few prints. After that, you’ll need to buy filament. Here’s exactly what to get:
Start with PLA
PLA (Polylactic Acid) is the right filament for beginners. It prints at low temperatures (200–220°C), sticks to the build plate reliably, doesn’t warp, doesn’t require an enclosure, and produces good results with minimal tuning. It’s made from cornstarch and breaks down over time — not a structural material, but perfect for enclosures, brackets, and creative projects.
Do not start with ABS, ASA, or Nylon. These materials require enclosed printers, higher temperatures, and experience with first-layer adhesion. They’re excellent once you know what you’re doing; they’re a frustration trap when you don’t.
Recommended filament brands
| Brand | Price/kg | Notes |
|---|---|---|
| Bambu Lab PLA Basic | ~$18/kg | Best match for Bambu printers — profiles pre-tuned |
| Hatchbox PLA | ~$15/kg | Reliable, widely available on Amazon, great color range |
| Overture PLA | ~$16/kg | Forgiving temperature range, minimal stringing for beginners |
| Polymaker PolyLite PLA Pro | ~$20–$25/kg | Step up in quality — cleaner surfaces, better dimensional accuracy |
| eSUN PLA+ | ~$19/kg | Slightly tougher than standard PLA, good for functional parts |
How much to buy: One 1kg spool is about 335 meters of 1.75mm filament. That prints dozens of small projects — a 20g phone stand, a 15g cable clip, a 50g enclosure. For a first gift, 2–3 spools in different colors is a great start.
Where to buy: Amazon for Hatchbox, Overture, and eSUN. Bambu Lab store for Bambu-branded filament if gifting a Bambu printer. MatterHackers for wider brand selection.
Color tip: White and light gray filament show layer quality best and make post-processing (sanding, painting) easiest. Bright colors are more motivating for new printers. Let the teen pick the color — it’s their machine.
Gift tip: Bundle the printer with 2 spools of PLA in different colors, a small pack of painter’s tape for the build plate, and a 3-month subscription to Printables.com’s premium tier (which unlocks downloadable models). Total gift budget: printer + ~$50. Total hours of projects: unlimited.
Projects to build with your 3D printer
A 3D printer pairs perfectly with ESP32 projects — print custom enclosures and parts for everything you build:
| Project | What you’ll build | Time |
|---|---|---|
| ESP32 + 3D Print Combo | Printable cases for ESP32 gadgets | ~2h |
| DIY Smartwatch | Custom watch with printed enclosure | ~3h |
| FPV Rover | Camera rover with printed chassis | ~3h |
| Sumo Bot | Fighting robot with printed body | ~2h |
| Smart Star Topper | LED star with printed housing | ~2h |
Prices verified October 2026. Availability subject to change. All affiliate links go through /go/ redirects.